1. Measure fuel level. Adjust if out of specification.

Measurement steps:
• Place the motorcycle on a level surface.
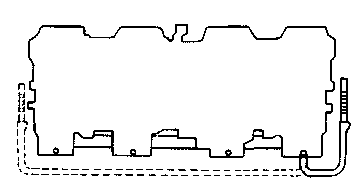
• Shim the center stand as required to level from side to side using a level across the carb bank
NOTE: The carburetor bank can be used as a level. Set petcock to "PRI" or use temporary fuel supply. Check that the fuel level of one carb against both left and right sides of bank is be equal.
• Use a garage jack under the engine or block under the front wheel to ensure that the carburetor is positioned vertically by raising the front wheel until the rear is touching the ground.
• Take measurements at center of closest outboard Carburetor body
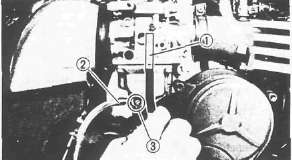
• Connect the Fuel Level Gauge 1 (90890-01312) to the drain opening 2 .
• Loosen the drain screw 3 and start the engine.
• Check the fuel level, one carburetor at a time.
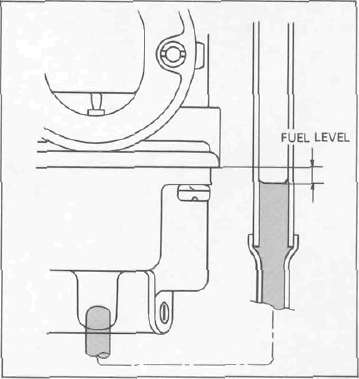
Fuel Level a: bottom of meniscus to bottom edge of the carburetor body 3.0 ±1.0 mm (0.12 ± 0.04 in)
NOTE:
• Raise the hose as high as possible before opening the drain screw, and slowly lower the hose into position to ensure no air is trapped in the hose.
• Once the drain screw is open, lower it into position. Never raise the hose while taking the measurements. Raising the hose will make the measurement inaccurate.
• Set the petcock to "PRI" or use a temporary fuel supply
• Watch the level carefully for a few moments after taking the reading. If the level slowly rises, the float needle valve is leaking and must be polished or replaced.
2. Adjust:
• Fuel level (If necessary)

Adjustment steps:
• Remove the carburetors.
• Adjust float level by bending the float tang 1 slightly.
• Repeat the procedure for the other carburetors.
NOTE: It's easy to lose track of the carb #s once you flip them upside down to make that float tang adjustment. Marking the #1 carb with a piece of tape will help keep them identified.
- Printer-friendly version
- Log in to post comments