TCI Identification
The following is a guide to determing if a used TCI is appropriate for a given machine:
The following is a guide to determing if a used TCI is appropriate for a given machine:
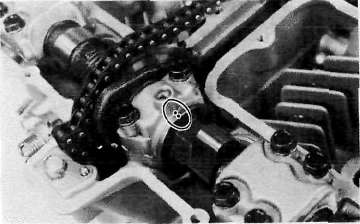
a. Rotate each cam shaft until the dot on the cam is aligned with the arrow on the center cam cap.
CAUTION:
Use extreme caution when rotating the cams. Two possible dangers exist. First, the wrench may contact the head and fracture it. Or second, a valve may become bent if the cam is turned the wrong way.
1. Upper crankcase
a. Install the connecting rods onto the crankshaft with the proper connecting rod bearings and apply molybedenum disulfide grease to the bolt threads. Apply torque evenly to both ends of the cap.
Free play adjustment
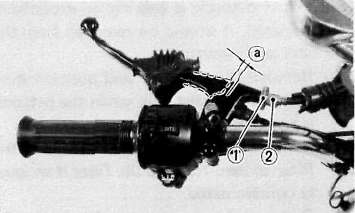
a. Loosen either the handlebar lever adjuster lock nut or the cable length adjuster lock nut.
b. Turn the cable length adjuster either in or out until proper lever free play is achieved.
Clutch lever free play:
2 - 3mm (0.08 ~ 0.12 in)
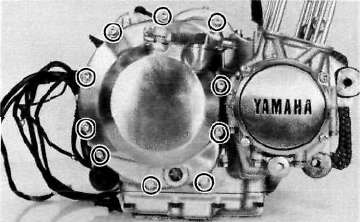
1. Remove right crankcase cover.
2. Release the tension evenly on the 6 mm bolts and remove the clutch pressure plate and clutch springs.
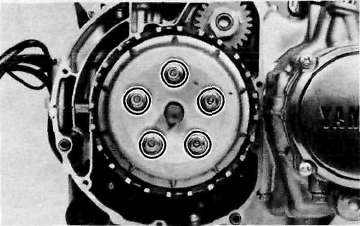
3. Remove the friction plates and clutch plates.
1. Check the electrode condition and wear, insulator color and electrode gap.
2. Use a wire gauge for measuring the plug gap.
3. If the electrodes become too worn, replace the spark plug.
4. When installing the plug, always clean the gasket surface. Wipe off any grime that might be present on the surface of the spark plug, and torque the spark plug properly.
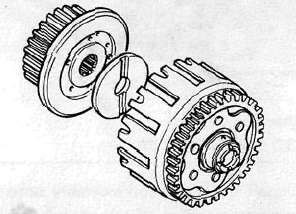
Clutch assembly
a. Install the primary drive gear and collar.
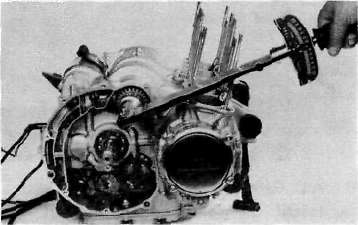
Tightening torque: 5.0 m-kg (36.0 ft-lb)
b- Install the primary driven gear assembly.
c. Install the clutch boss and thrust plate.
A. Valve clearance adjustment
NOTE:
Valve clearance must be measured with the engine and at room temperature.
1. Open the seat and remove the fuel tank.
2. Remove the flasher relay and spark plug lead wires.
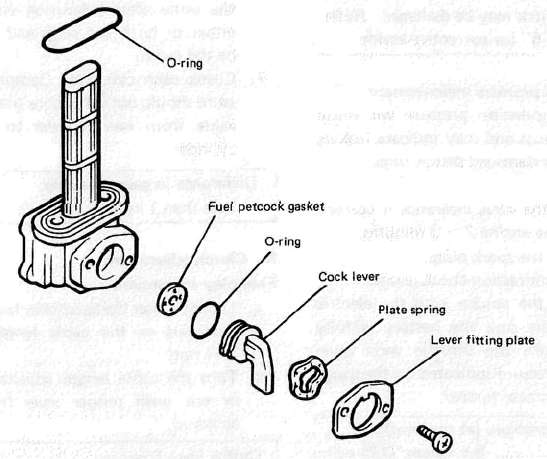
If the fuel petcock is
leaking or excessively contaminated, it should be removed from the fuel
tank and inspected.
1.
Remove the fuel tank and position it so that fuel will not spill when
the petcock is removed.
2.
Remove the petcock and inspect the filter screen. Replace the filter if
seriously contaminated.
1. Check the clearance between housing and outer rotor.
Standard clearance:
0.09 ~ 0.15 mm (0.0035 ~ 0.0059 in)
2. Check the clearance between outer rotor and inner rotor.
Standard clearance: 0.03 ~ 0.09 mm (0.0012 ~ 0.0035 in)
3. Check the plunger for scrathces and wear.