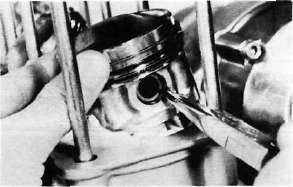
11. Pistons and Cylinder a. Install the pistons on the rods. The arrow on the piston must point to the front of the engine.
NOTE:
Before installing the piston pin clips, cover the crankcase with a clean rag so you will not accidentally drop the circlip into the crankcase. Always install new piston pin circlips.
b. Install the rear chain guide on its pivot. Tighten the holding bolt until it stops and then loosen 1/4 turn and then tighten the lock nut.
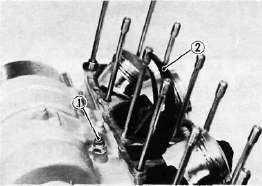
1. Holding bolt 2. Rear chain guide
c. Install the new cylinder base gasket and dowel pins. Install the new "O-rings" to the right side dowei pins.
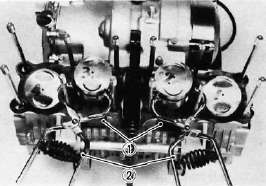
d. Set the crankshaft so that the all pistons are equal height and align the piston rings as shown.
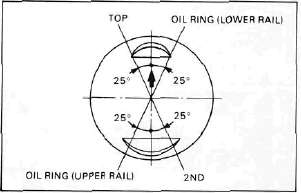
CAUTION:
Make sure the ends of the oil ring expanders are not overlapped.
NOTE:
Manufacturer's marks or numbers stamped on the rings are on the top side of the rings. Coat the pistons and rings well with oil.
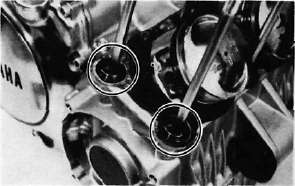
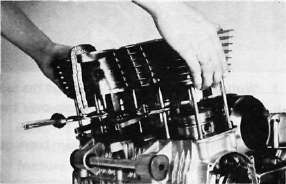
e. Install the piston ring compressors (special tool) and piston bases (special tool). Four piston bases are required.
1. Piston bases 2. Piston ring compressors
f. Tie the cam chain with a piece of mechanic's wire and feed it through the chain opening. Carefully lower the cylinder onto the pistons. Remove the ring compressors and piston bases and repeat this procedure for pistons 1 and 4.
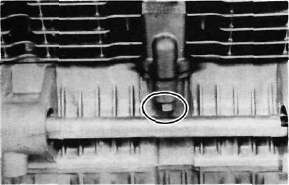
g. Install the cylinder securing nut (front side) and tighten it to the specification.
Tightening torque: 2.0 m-kg (14.5 ft-lb)
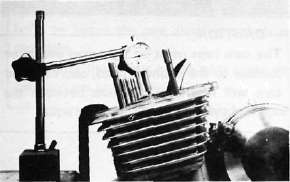
h. Set the dial gauge on the No. 1 piston head center as shown to find the No. 1 piston top dead center and check whether the "1" mark on the timing plate and stationary pointer are aligned or not. If not, loosen the pointer securing screw and adjust.
- Printer-friendly version
- Log in to post comments