Parts Illustrations
PARTS ILLUSTRATIONS
- Read more about Parts Illustrations
- Log in to post comments
PARTS ILLUSTRATIONS
ENGINE OVERHAUL
A. Cylinder Head and Cylinder
1. Remove the cylinder head cover.
2. Remove the left crankcase cover (pickup coil cover).
3. Remove the cam chain tensioner.

11. Pistons and Cylinder a. Install the pistons on the rods. The arrow on the piston must point to the front of the engine.
NOTE:

13. Remove the front cylinder holding nut and remove the cylinder assembly. It may be necessary to tap the cylinder lightly to loosen it from the base gasket.

14. Remove the rear cam chain guide by loosening the holding bolt.
Tightening torque
Note: Torque values are for a clean, dry fastener unless otherwise noted.
|
Part to be tightened |
Part name |
Thread size |
C. Piston
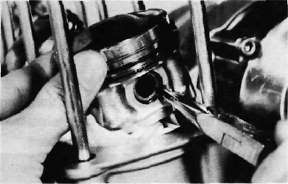
1. Mark each piston to aid in reassembly.
2. Place a clean towel or rag into the crank-case to keep circlips and material from falling into the engine.
3. Remove piston pin clips, piston pins, and pistons.

D. Pick-up Coil Assembly
D. Remounting Engine
Refer to Engine Removal and reverse the applicable removal steps.
CAUTION:
Always use new bolts in the drive shaft coupling.
2. Install and tighten the engine mounting bolts.
12. Cylinder head and Cam shafts
a. Install the new cylinder head gasket. Install the dowel pins and "O-rings". Locate the cam chain cavity cylinder seal with the tabs down.

b. Install the cylinder head onto the cylinder. Pull the cam chain through the cylinder head as it is installed. Tie the cam chain so that it does not fall into the crankcase.
C. Middle Gear Servicing
1. Disassembly
Refer to page 39 for disassembly.
2. Inspection
Refer to page 52 for inspection.
3. Gear lash check
NOTE:
ENGINE
A. Valve Clearance Adjustment