CRANKSHAFT AND CONNECTING ROD

Crankshaft Runout
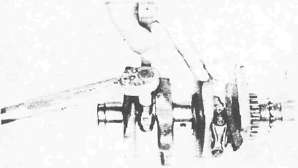
1. Place both ends of crankshaft on V-blocks.
2. Rotate Crankshaft
3. Measure the crankshaft runout at main journal bearings. Use a Dial Gauge (90890-03097).
Maximum Crankshaft Runout: 0.03 mm (0.0012 in)
Connecting Rod Bearings
1 . Inspect bearings for Burns/Flaking/Roughness/Scratches. Replace as necessary.
Connecting Rod Bearing Clearance
1. Clean all parts thoroughly.

2. Install connecting rod bearings 1 into connecting rod and cap.
3. Attach Plastigage® 2 onto crankpin.
4. Position:
• Connecting rod 3 onto crankshaft.
• Connecting rod cap 4

NOTE:
• Be sure the "Y" marks 1 on the connecting rods face toward left crankshaft end.
• Be sure the letters on both components align to form a perfect character.
5. Apply:
Molybdenum disulfide grease (to bolt threads)
Torque both ends of rod cap evenly.
NOTE:
Do not move connecting rod until a clearance measurement has been completed.
CAUTION:
Tighten to full torque specification without pausing. Apply continuous torque between 2.0 and 3.6 m-kg. Once you reach 2.0 m-kg DO NOT STOP TIGHTENING until final torque is reached. If tightening is interrupted between 2.0 and 3.6 m-kg, loosen nut to less than 2.0 m-kg and start again.
Connecting Rod Cap: 3 6 Nm (3.6 m-kg, 26 ft-lb)
6. Remove connecting rod cap carefully.

7. Measure Plastigage® width 1 . Replace connecting rod bearing if clearance is excessive.
Connecting Rod Bearing Clearance: 0.032 ~ 0.056 mm (0.0013- 0.0022 in)
Crankshaft Main Bearing Clearance Measurement
1. Clean all parts.
2. Position upper crankcase half. Place on a bench in an upside down position.
3. Install:
• Bearings into the upper crankcase
• Crankshaft
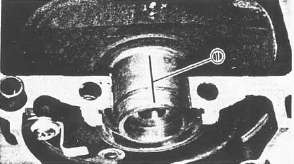
4. Attach Plastigage® (YU-33210) 1 onto the crankshaft journal surface.
NOTE:
Do not move crankshaft until clearance measurement has been completed
5. Install:
• Bearings into lower crankcase
• Lower crankcase
6. Tighten bolts

CAUTION:
Tighten to full torque in torque sequence cast on the crankcase.
9 mm (0.36 in) Bolt: 3 6 Nm (3.6m-kg, 2 5 fMb)
7. Remove bolts in reverse assembly order. carefully remove lower crankcase.
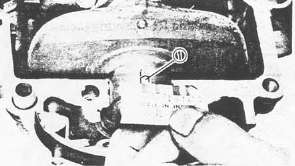
8. Measure Plastigage® width 1
Out of specification -> Replace bearings. Replace crankshaft if necessary.
Main Bearing Oil Clearance: 0.020 - 0.044 mm (0.0008-0.0017 in)
Crankshaft Main and Connecting Rod Bearing Selection

• Numbers used to indicate crankshaft journal sizes are stamped on the LH crankweb. The first five are main bearing journal numbers, starting with the left journal. The four rod bearing journal numbers follow in the same sequence.

• The upper crankcase half is numbered J1, J2, J3, J4, and J5 on the rear right boss as shown.
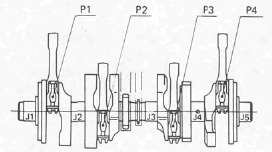
•The connecting rods are numbered 4 or 5 .
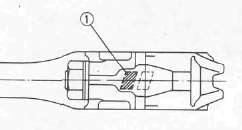
The numbers are stamped in ink on the rod cap 1.
|
Bearing Color Code |
|
|
No. 1 |
Blue |
|
No. 2 |
Black |
|
No. 3 |
Brown |
|
No. 4 |
Green |
|
No. 5 |
Yellow |
* No. 5 applies only to the crankshaft main bearing selection.
Example, Selection of the crankshaft main bearing:
If the crankcase J1 and crankshaft J1 sizes are No. 4 and No. 1 , respectively, the bearing size No. is:
Bearing size No. = Crankcase No. minus Crankshaft No.
= 4 -1 = 3 (Brown)
Example 2 , Selection of the connecting rod bearing:
If the connecting rod P1 and crankshaft P1 sizes are No. 4 and No. 1 , respectively, the bearing size No. is:
Bearing size No. = Connecting rod No. minus- Crankshaft No.
= 4 -1 = 3 (Brown)
- Printer-friendly version
- Log in to post comments
