Chapter 2, MAINTENANCE
Chapter 2, MAINTENANCEINTRODUCTION
This chapter includes all information necessary to perform recommended inspections and adjustments. These preventive maintenance procedures, if followed, will ensure more reliable vehicle operation and a longer service life. The need for costly overhaul work will be greatly reduced. This information applies to vehicles already in service as well as new vehicles that are being prepared for sale. All service technicians should be familiar with this entire chapter.
Engine Maintenance
Engine MaintenanceValve Clearance Adjustment
Valve Clearance Adjustment
VALVE CLEARANCE ADJUSTMENT

1 Valve lifter 2 Pad 3 Retainer 4 Spring seat
Valve Clearance (Cold):
Intake: 0.11 -0.20 mm (0.004- 0.008 in)
Exhaust: 0.21- 0.30 mm (0.008- 0.012 in)
Measurement
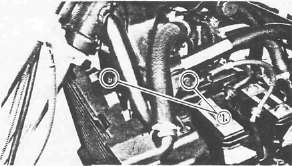
1. Remove:
• Seat
• Fuel tank
• Horns
• Ignition coil mount bolts (1)
2. Disconnect the spark plug caps

3. Remove:
• Ignition coils
• Spark plugs
• Cylinder head cover
• Left crankcase cover
4. Measure the valve clearance
NOTE:.
Be sure piston is at Top Dead Center (TDC) on compression stroke when measuring clearance.
Valve clearance measurement steps:
•Turn the crankshaft counterclockwise with a 19 mm (0.75 in) spanner.
NOTE:
Valve clearance must be measured when the engine is cool to the touch.

(1) Pickup coil mark
(2) TDC for No. 1 cylinder
(3) Firing range for the No. 1 cylinder
•Align the "T" mark (2) on the timing plate with the pickup coil mark (1) . When the "T" mark is aligned with the stationary pointer (2) . the piston is at top dead center (TDC).

• Measure the valve clearance using a Feeler Gauge (3).
• Record the measured amount if the clearance is incorrect.
Intake Valve (cold): 0.11- 0.20 mm (0.004- 0.008in)
Exhaust Valve (cold): 0.21- 0.30 mm (0.008- 0.012 in)
Measure valve clearance, in sequence, for Nos. 2, 4, and No. 3 cylinders.
Out of specification - Adjust clearance.
Firing Sequence: 1 -2-4-3

[A] Crankshaft counterclockwise turning angle. [Bl Cylinder [C] Combustion

Adjustment
1. Remove carburetors Refer to CHAPTER 3 "ENGINE REMOVAL".

2. Loosen the cam chain tensioner end plug (1)
3. Remove the cam chain tensioner (2)

4. Remove:
•Cam chain guide (Upper) (1)
•Cam cap I3 (2)
•Cam cap E3 (3)
• Dowel pins
5. Remove:
•Cam chain sprocket bolts
•Cam caps
•Dowel pins

•Cam shafts (1)
•Cam chain sprockets (2)
NOTE:
Fasten safety wire to the cam chain to prevent it from falling into the crankcase.

6. Remove:
• Valve lifter (1)
• Pad (2)

Note the installed pad number (3). Round off the value as required:
|
Pad range |
Pad Availability: 25 increments |
|
|
No. 120 ~ No. 240 |
1.20 mm (0.047 in) 2.40 mm (0.094 in) |
Pads stepped in 0.05 mm (0.002 in) increments |
|
Note: Thickness of each pad is marked on the pad side wall. |
||
|
• Round off the hundredths digit of the installed pad number to the nearest 0.05 mm increment. |
||
|
Hundredths digit |
Rounded valve |
|
|
0 or 2 |
0 |
|
|
5 |
(NOT ROUNDED OFF) |
|
|
8 |
10 |
|
7. Select the proper pad from the appropriate chart (next 2 pages, links below)
EXAMPLE:
Installed pad number = 175 (1.75 mm)
Rounded off digit = 175
NOTE:
Pads can only be selected in 0.05 mm (0.02 in) increments.
* Locate the "Rounded off Pad Number" on the chart, and then find the measured valve clearance. The point where these coordinates intersect is the new pad number.
NOTE:
Use the new pad number as a guide only as the number must be verified.

8. Install:
• Pad (1)
• Valve lifter (2)
• Cam shaft
• Cam chain sprocket
Refer to CHAPTER 3 "ENGINE ASSEMBLY"

9. Recheck the valve clearance.
If the clearance is incorrect, repeat all of the clearance adjustment steps until the proper clearance is obtained.
Assembly
1. Reverse removal steps.
Inspect the head cover gasket and replace it if damaged.
2. Tighten:
• Cylinder head cover bolts
• Fuel tank bolts
Head Cover Bolt: 10 Nm (1.0 m.kg, 7.2 ft-lb)
Fuel Tank Bolt: 10 Nm (1.0 m.kg, 7.2 ft-lb)
Exhaust Valve Shim Chart
Exhaust Valve Shim ChartEXHAUST
|
MEASURED CLEARANCE |
INSTALLED PAD NUMBER |
|||||||||||||||||||||||||
|
120 |
125 |
130 |
135 |
140 |
145 |
150 |
155 |
160 |
165 |
170 |
175 |
180 |
185 |
190 |
195 |
200 |
205 |
210 |
215 |
220 |
225 |
230 |
235 |
240 |
||
|
0.00-0.02 |
|
|
|
|
|
120 |
125 |
130 |
135 |
140 |
145 |
150 |
155 |
160 |
165 |
170 |
175 |
180 |
185 |
190 |
195 |
200 |
205 |
210 |
215 |
|
|
0.03-0.07 |
|
|
|
|
120 |
125 |
130 |
135 |
140 |
145 |
150 |
155 |
160 |
165 |
170 |
175 |
180 |
185 |
190 |
195 |
200 |
205 |
210 |
215 |
220 |
|
|
0.08-0.12 |
|
|
|
120 |
125 |
130 |
135 |
140 |
145 |
150 |
155 |
160 |
165 |
170 |
175 |
180 |
185 |
190 |
195 |
200 |
205 |
210 |
215 |
220 |
225 |
|
|
0.13-0.17 |
|
|
120 |
125 |
130 |
135 |
140 |
145 |
150 |
155 |
160 |
165 |
170 |
175 |
180 |
185 |
190 |
195 |
200 |
205 |
210 |
215 |
220 |
225 |
230 |
|
|
0.18-0.20 |
|
120 |
125 |
130 |
135 |
140 |
145 |
150 |
155 |
160 |
165 |
170 |
175 |
180 |
185 |
190 |
195 |
200 |
205 |
210 |
215 |
220 |
225 |
230 |
235 |
|
|
0.21-0.30 |
RECOMMENDED CLEARANCE |
|||||||||||||||||||||||||
|
0.31-0.32 |
125 |
130 |
135 |
140 |
145 |
150 |
155 |
160 |
165 |
170 |
175 |
180 |
185 |
190 |
195 |
200 |
205 |
210 |
215 |
220 |
225 |
230 |
235 |
240 |
|
|
|
0.33-0.37 |
130 |
135 |
140 |
145 |
150 |
155 |
160 |
165 |
170 |
175 |
180 |
185 |
190 |
195 |
200 |
205 |
210 |
215 |
220 |
725 |
230 |
735 |
240 |
|
||
|
0.38-0.42 |
135 |
140 |
145 |
150 |
155 |
160 |
165 |
170 |
175 |
180 |
185 |
190 |
195 |
200 |
205 |
210 |
215 |
220 |
225 |
230 |
235 |
240 |
|
|||
|
0.43-0.47 |
140 |
145 |
150 |
155 |
160 |
165 |
170 |
175 |
180 |
185 |
190 |
195 |
200 |
205 |
210 |
215 |
220 |
225 |
230 |
235 |
240 |
|
||||
|
0.48-0.52 |
145 |
150 |
155 |
160 |
165 |
170 |
175 |
180 |
185 |
190 |
195 |
200 |
205 |
210 |
215 |
220 |
225 |
230 |
235 |
240 |
|
|||||
|
0.53-0.57 |
150 |
155 |
160 |
165 |
170 |
175 |
180 |
185 |
190 |
195 |
200 |
205 |
210 |
215 |
220 |
225 |
730 |
235 |
740 |
|
||||||
|
0.58-0.62 |
155 |
160 |
165 |
170 |
175 |
180 |
185 |
190 |
195 |
200 |
205 |
210 |
215 |
220 |
225 |
230 |
235 |
240 |
|
|||||||
|
0.63-0.67 |
160 |
165 |
170 |
175 |
180 |
185 |
190 |
195 |
200 |
205 |
210 |
215 |
220 |
225 |
230 |
235 |
240 |
|
||||||||
|
0.68-0.72 |
165 |
170 |
175 |
180 |
185 |
190 |
195 |
200 |
205 |
210 |
215 |
220 |
225 |
230 |
235 |
240 |
|
|||||||||
|
0.73-0.77 |
170 |
175 |
180 |
185 |
190 |
195 |
200 |
205 |
210 |
215 |
220 |
225 |
230 |
235 |
240 |
|
||||||||||
|
0.78-0.82 |
175 |
180 |
185 |
190 |
195 |
200 |
205 |
210 |
215 |
220 |
225 |
230 |
235 |
240 |
|
|||||||||||
|
0.83-0.87 |
180 |
185 |
190 |
195 |
200 |
205 |
210 |
215 |
220 |
225 |
230 |
235 |
240 |
|
||||||||||||
|
0.88-0.92 |
185 |
190 |
195 |
200 |
205 |
210 |
215 |
220 |
225 |
230 |
235 |
240 |
|
|||||||||||||
|
0.93-0.97 |
190 |
195 |
200 |
205 |
210 |
215 |
220 |
225 |
230 |
235 |
240 |
|
||||||||||||||
|
0.98-1.02 |
195 |
200 |
205 |
210 |
215 |
220 |
225 |
230 |
235 |
240 |
VALVE CLEARANCE (cold): 0.21 - 0.30 mm (0.008 - 0.012 in) Example: Installed is 175 Measured clearance is 0.35 mm (0.014 in) Replace 175 pad with 185 pad |
|||||||||||||||
|
1.03-1.07 |
200 |
205 |
210 |
215 |
220 |
225 |
230 |
235 |
240 |
|
||||||||||||||||
|
1.08-1.12 |
205 |
210 |
215 |
220 |
225 |
230 |
235 |
240 |
|
|||||||||||||||||
|
1.13-1.17 |
210 |
215 |
220 |
225 |
230 |
235 |
240 |
|
||||||||||||||||||
|
1.18-1.22 |
215 |
220 |
225 |
230 |
235 |
240 |
|
|||||||||||||||||||
|
1.23-1.27 |
220 | 225 |
230 |
235 |
240 |
|
||||||||||||||||||||
|
1.28-1.32 |
225 |
230 |
235 |
240 |
|
|||||||||||||||||||||
|
1.33-1.37 |
230 |
235 |
240 |
|
||||||||||||||||||||||
|
1.38-1.42 |
235 |
240 |
|
|||||||||||||||||||||||
| 1.43-1.47 | 240 | |||||||||||||||||||||||||
Intake Valve Shim Chart
Intake Valve Shim ChartINTAKE
|
MEASURED CLEARANCE |
INSTALLED PAD NUMBER |
120 |
125 |
130 |
135 |
140 |
145 |
150 |
155 |
160 |
165 |
170 |
176 |
180 |
185 |
190 |
195 |
200 |
205 |
210 |
215 |
220 |
225 |
230 |
235 |
240 |
0.00-0.02 |
|
|
|
120 |
125 |
130 |
135 |
140 |
145 |
150 |
155 |
160 |
165 |
170 |
175 |
180 |
185 |
190 |
195 |
200 |
205 |
210 |
215 |
220 |
225 |
0.03-0.07 |
|
|
120 |
125 |
130 |
135 |
140 |
145 |
150 |
155 |
160 |
165 |
170 |
175 |
180 |
185 |
190 |
195 |
200 |
205 |
210 |
215 |
220 |
225 |
230 |
0.08-0.10 |
|
120 |
125 |
130 |
135 |
140 |
145 |
150 |
155 |
160 |
165 |
170 |
175 |
l80 |
185 |
190 |
195 |
200 |
205 |
210 |
215 |
220 |
225 |
230 |
235 |
0.11-0.20 |
RECOMMENDED CLEARANCE |
0.21-0.22 |
125 |
130 |
135 |
140 |
145 |
150 |
155 |
160 |
166 |
170 |
175 |
180 |
185 |
190 |
19b |
200 |
205 |
210 |
215 |
220 |
225 |
230 |
235 |
240 |
|
0.23-0.27 |
130 |
135 |
140 |
145 |
150 |
155 |
160 |
165 |
170 |
175 |
180 |
185 |
190 |
195 |
200 |
205 |
210 |
215 |
220 |
225 |
230 |
235 |
240 |
|
0.28-0.32 |
135 |
140 |
145 |
150 |
155 |
160 |
165 |
170 |
175 |
180 |
185 |
190 |
195 |
200 |
205 |
210 |
215 |
220 |
225 |
230 |
235 |
240 |
|
0.33-0.37 |
140 |
145 |
150 |
155 |
160 |
165 |
170 |
175 |
180 |
185 |
190 |
195 |
200 |
205 |
210 |
215 |
220 |
225 |
230 |
235 |
240 |
|
0.38-0.42 |
145 |
150 |
155 |
160 |
165 |
170 |
175 |
180 |
185 |
190 |
195 |
200 |
205 |
210 |
215 |
220 |
225 |
230 |
235 |
240 |
|
0.43-0.47 |
150| |
155 |
160 |
165 |
170 |
175 |
180 |
185 |
190 |
195 |
200 |
205 |
210 |
215 |
220 |
225 |
230 |
235 |
240 |
|
0.48-0.52 |
155 |
160 |
165 |
170 |
175 |
180 |
185 |
190 |
195 |
200 |
205 |
210 |
215 |
220 |
225 |
230 |
235 |
240 |
|
0.53-0.57 |
160 |
165 |
170 |
175 |
180 |
18b |
190 |
195 |
200 |
205 |
210 |
215 |
220 |
225 |
230 |
235 |
240 |
|
0-58-0.62 |
165 |
170 |
175 |
180 |
185 |
190 |
195 |
200 |
205 |
210 |
215 |
220 |
225 |
230 |
235 |
210 |
|
0.63-0.67 |
170 |
175 |
180 |
185 |
190 |
195 |
200 |
205 |
210 |
215 |
220 |
225 |
230 |
235 |
240 |
|
0.68-0.72 |
175 |
180 |
185 |
190 |
195 |
200 |
205 |
210 |
215 |
220 |
225 |
230 |
235 |
240 |
|
|
0.73-0.77 |
180 |
185 |
190 |
195 |
200 |
205 |
210 |
215 |
220 |
225 |
230 |
235 |
240 |
|
0.78-0.82 |
185 |
190 |
195 |
200 |
205 |
210 |
215 |
220 |
225 |
230 |
235 |
240 |
|
0.83-0.87 |
190 |
195 |
200 |
205 |
210 |
215 |
220 |
225 |
230 |
235 |
240 |
|
0.88-0.92 |
195 |
200 |
205 |
210 |
215 |
220 |
225 |
230 |
235 |
240 |
|
0.93-0.97 |
200 |
205 |
210 |
215 |
220 |
225 |
230 |
235 |
240 |
|
0.98-1.02 |
205 |
210 |
215 |
220 |
225 |
230 |
235 |
240 |
VALVE CLEARANCE (cold): 0.11 -0.20 mm (0.004 - 0.008 in) Example: Installed is 175 Measured clearance is 0.24 mm (0.009 in) Replace 175 pad with 185 pad |
1.03-1.07 |
210 |
215 |
220 |
225 |
230 |
235 |
240 |
|
1.08-1.12 |
215 |
220 |
225 |
230 |
235 |
240 |
|
1.13-1.17 |
220 |
225 |
230 |
235 |
240 |
|
1.18-1.22 |
225 |
230 |
235 |
240 |
|
1.23-1.27 |
230 |
235 |
240 |
|
1.28-1.32 |
235 |
240 |
|
1.33-1.37 |
240 |
|
|
Spark Plug, Crankcase Ventilation, Fuel Line and Exhaust
Spark Plug, Crankcase Ventilation, Fuel Line and ExhaustSPARK PLUG
1. Remove spark plugs

2. Inspect:
• Electrode (1) for wear/damage.
• Insulator color (2)
3. Measure the plug gap (3) using a Wire Gauge or Feeler Gauge. Regap as reqired.
Plug Gap: 0.6 - 0.7 mm (0.024 - 0.028 in)
Clean the plug with a spark plug cleaner if necessary.
Standard Spark Plug: DR8ES-L (NGK) X24ESR-U (NIPPONDENSO)
Before installing a spark plug, clean the gasket surface and plug surface.
4. Tighten Spark plug(s) to 17.5 Nm (1.75 m-kg, 12.5 ft-lb)
NOTE:
Finger-tighten the spark plug(s) before torquing to specification.
CRANKCASE VENTILATION SYSTEM
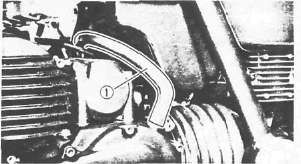
1. Inspect the crankcase ventilation hose (1). Replace damaged hoses.

FUEL LINE
1. Inspect:
• Fuel hose (1)
• Vacuum hose (2)
Replace damaged hoses.

INTAKE MANIFOLD
1. Tighten:
• Carburetor clamps
• Carburetor joint bolts
2. Inspect:
• Carburetor joint
• Gaskets
Replace if necessary.

EXHAUST SYSTEM
1. Inspect:
•Exhaust pipe gasket(s) (1)
• Muffler clamp gasket(s) (2)
Damage > Replace.
Exhaust gas leakage > Repair.
2. Tighten:
• Exhaust pipe bolts
• Muffler bolts
Exhaust Pipe Flange (3) :10 Nm(1.0m-kg, 7.2ft-b)
Exhaust Pipe Clamp (4) :20 Nm (2.0 m-kg, 14 ft-lb)
Exhaust Chamber Mount (5): 25 Nm (2.5 m-kg, 18 ft-lb)
Muffler Clamp (6): 20 Nm (2.0 m-kg, 14 ft-lb)
Muffler Bracket (7) 20 Nm (2.0 m-kg, 14 ft-lb)
Carburettor - Idle speed and Synchronization
Carburettor - Idle speed and SynchronizationIDLE SPEED

1. Adjust the idle speed. Warm up the engine and turn the throttle stop screw (1) to adjust.
Idle Speed:
1,050 ± 50 r/min
CARBURETOR SYNCHRONIZATION
Carburetor Adjustment
Carburetors must be set properly before synchronizing the carburetors.
NOTE:
Valve clearance must be set properly before synchronizing the carburetors.

1. Remove:
• Seat
• Fuel tank
2. Disconnect:
• Vacuum plugs (1)
• Vacuum hose (2)

3. Install:
• Vacuum Gauge (90890-03094)(1)
• Suitable test fuel tank
4. Start the engine and let it warm up.

5. Turn throttle stop screw (1) to adjust idle speed to 1,050 ± 50r/min.
6. Adjust carburetor synchronization

Carburetor synchronization adjustment steps:
•Synchronize the carburetor No. 1 to the carburetor No. 2 by turning the synchronizing screw "1" until the both gauge readings are the same.
•Rev. the engine for a fraction of a second, two or three times, and check the synchronization again.
Vacuum Pressure at Idle Speed: 24 kPa (180 mm Hg, 7.1 in Hg)
Vacuum Synchronous Difference: 0.7 kPa (5 mm Hg, 0.2 in Hg)
• Repeat the above steps to synchronize the carburetor No. 4 to the carburetor No.3 by turning the synchronizing screw " 3 " until the both gauge readings are the same.
• Repeat the same steps to synchronize No. 3 carburetor to No. 2 carburetor, then turn synchronizing screw " 2 " until both gauge readings are the same.
Engine Oil
Engine OilENGINE OIL

At 5°C(40°F) or Higher: Yamalube 4-Cycle Oil or SAE 20W40 Type SE Motor Oil
At15°C(60°F) or Lower: SAE 10W30 Type SE Motor Oil
Note:
recommended engine oil classification; API Service "SE", "SF" type or equivalent (e.g. "SF-SE", "SF-SE-CC", "SF-SE-SD" etc.)
Oil Level Measurement
1. Check the oil level. Add as required.
Oil level visual inspection steps:
•Place the motorcycle on its centerstand and warm up the engine for several minutes.
NOTE:
Position the motorcycle straight up when checking oil level, a slight tilt to the side can produce false readings.

• Stop the engine and visually check the oil level through the level window (1) .
(2) Maximum
(3) Minimum
Oil Change (Without filter)
1. Warm up the engine for several minutes, then place a receptacle under the engine.
2. Remove: The oil filler cap

3. Remove the drain plug (1) and drain the engine oil.
4. Replace and tighten the drain plug
Engine Drain Plug: 43 Nm (4.3 m-kg, 31 fMb)
5. Fill the crankcase with engine Oil: 2.5 L (2.2 Impqt, 2.6 US qt)
CAUTION:
Do not allow foreign material to enter the crank-case.
6. Install the filler cap
Oil Change (With filter)
1. Warm up the engine and place a receptacle under the engine.
2. Remove:
• Oil filler cap
• Drain plug
Drain the engine oil.
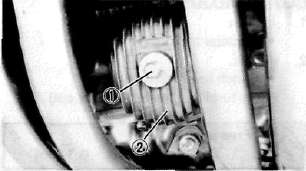
3. Remove:
• Oil filter bolt (1)
• Filter cover (2)
4. Replace and tighten the drain plug
Engine Drain Plug:
43 Nm (4.3 m-kg, 31 ftlb)
5. Install:

• Oil filter bolt 1
• Spring 2
• Washer 3
• Oil filter (New) 4
• O-ring 5 (x2, one on bolt, one on cover)
• Oil filter assembly

NOTE:
• Be sure the O-ring 5 is positioned properly.
• Fit the filter cover projection into the crank-case cover slot.
6. Tighten the oil filter bolt
Oil Filter Bolt: 15 Nm (1.5 nvkg. 11 ftlb)
7. Fill the crankcase with Engine Oil: 2.8 L (2.5 imp qt, 3.0 US qt)
8. Install the oil filler cap
9. Warm up the engine and check for oil leaks. Stop the engine instantly if leaking occurs.
10. Check the oil level
Level low — Add sufficient oil.
Coolant
CoolantCOOLANT

Recommended Coolant:
High Quality Ethylene Glycol Antifreeze Containing Anti-corrosion for Aluminum Engine Inhibitors Coolant and Water
Mixed Ratio: 50%/50%
Total amount: 2.4 L (2.11 Imp qt, 2.54 US qt)
Reservoir Tank Capacity: 0.49 L (0.43 Imp qt, 0.52 US qt)
From "LOW" to "FULL" Level: 0.14 L (0.12 Imp. qt, 0.15USqt)
WARNING:
Do not remove the radiator cap when the engine and radiator are hot. Scalding hot fluid and steam may be blown out under pressure, which could cause serious injury.
When the engine has cooled, open the radiator can by the following procedure: Place a thick rag, like a towel, over the radiator cap, slowly rotate the cap counterclockwise to the detent. This procedure allows any residual pressure to escape. When the hissing sound has stopped, press down on the cap while turning counterclockwise and remove it.
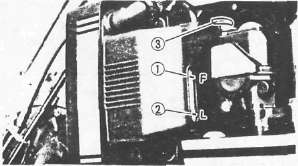
(1) "FULL" level (2) "LOW" level
Coolant Level Check
1. Check:
•Coolant level Coolant level low > Add sufficient coolant.

2. Remove:
• Reservoir tank cap (3)
• Cap retainer (4)
• Radiator cap (5)
3. Add:
• Coolant
Clutch Adjustment
Clutch Adjustment xjcdadmin Mon, 05/04/2009 - 16:25CLUTCH ADJUSTMENT

1. Loosen the adjuster locknut (1)
2. Adjust the clutch lever free play (a) by turning adjuster (2) in or out.
Free Play (a): 2 - 3mm (0.08-0.12 in)

3. If free play can not be adjusted, adjust by clutch cable length adjuster.
4. Loosen the adjuster locknuts (1)
5. Adjust clutch lever free play (a) by turning clutch cable length adjuster (2)
Ignition Timing Check
Ignition Timing CheckIGNITION TIMING CHECK
Flywheel is marked as follows:

(1) Pickup coil mark
(2) TDC for No. 1 cylinder
(3) Firing range for the No. 1 cylinder
1. Check:
• Ignition timing
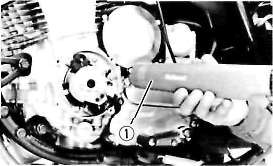
Ignition timing check steps:
• Remove the cover.
• Connect the Timing Light (YU-08037) (1) to No. 1 cylinder spark plug lead.
• Warm up the engine and let it idle at the specified idle speed of 1.050 ± 50 r/min.
• Visually check the upper pickup coil mark (T) is within the firing range (2) indicated on timing plate.
Incorrect firing — Check timing plate and/or pickup assembly (tightness damage)
Refer to CHARTER 6. "ELECTRICAL" for further information.
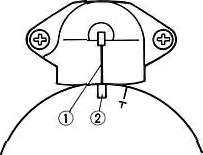
(1) Pickup coil mark.
(2) Firing range for the No. 1 cylinder
Compression Pressure Measurement
Compression Pressure MeasurementNOTE:
Insufficient compression pressure will result in performance loss.
1. Measure:
•Valve clearance
Out of specification > Adjust.
2. Warm up the engine.
3. Remove:
•Spark plugs
4. Measure:
• Compression pressure

Compression pressure measurement steps:
• Install the Compression Gauge (90890-03081) (1) using an adapter.
• Crank over the engine with the electric starter (be sure the battery is fully charged) with the throttle wide-open until the compression reading on the gauge stabilizes.
• Check readings with specified levels (See chart).
Compression Pressure (at sea level):
Standard: 1,059 kPa (10.8 kg/cm2, 154 psi)
Minimum: 1,098 kPa (11.2 kg/cm2, 159 psi)
Maximum: 1,138 kPa (11.6 kg/cm2, 165 psi)
WARNING:
When cranking the engine, ground all of the spark plug leads to prevent sparking.
• Repeat the previous steps for the other cylinders.
• If pressure falls below the minimum level:
1) Squirt a few drops of oil into the affected cylinder.
2) Measure the compression again.
Compression Pressure (with oil introduced into cylinder)
|
Higher than without oil |
Worn or damaged pistons |
|
Same as without oil |
Defective ring(s), valves, cylinder head gasket or piston is possible. |
|
Above maximum level |
Inspect cylinder head, valve surfaces, or piston crown for carbon deposits. |
NOTE:
The different between the highest and lowest cylinder compression readings must not vary more than the specified value.
Difference between Each Cylinder: Less than 98 kPa (1 kg/cm2, 14 psi)
Chassis Maintenance
Chassis MaintenanceFinal Gear Oil and Air Filter
Final Gear Oil and Air Filter
(1) Oil
FINAL GEAR OIL Oil Level Measurement
1. Place the motorcycle on a level area and place on its centerstand.
2. Remove the oil filler cap
3. Observe the oil level (2) and add oil if necessary.
NOTE:
Oil level must be up to the brim of the filler hole.
CAUTION:
Be sure that no foreign material enters the final gear case.

Gear Oil Replacement
1. Place a receptacle under the final gear case.
WARNING:
Spilling oil on the tires or on the ground under the tires will reduce traction and may result in an accident. Use a funnel, stiff piece of card, plastic or similar to ensure all oil is directed into the receptacle.
2. Remove the filler cap and drain plug (1). Drain final gear oil into the receptacle.
3. Re-install the drain plug. Torque to 23 Nm (2.3 m-kg, 17 ft-lb).
4. Fill the gear case to the specified level.
Final Gear Oil: SAE 80 API "GL-4" Hypoid gear oil
Oil Capacity: 0.20 L (0.18 Imp qt, 0.21 US qt)
NOTE:.
If desired, an SAE 80W90 Hypoid gear oil may be used for all conditions.
5. Install the filler cap. Torque cap to 23 Nm (2.3 m-kg, 17 ft-lb)
AIR FILTER
1. Remove the seat, fuel tank and rubber cover.

2. Remove the air filter cover (1)

3. Eliminate dust using compressed air.
Note:
Blow out dust from the inside out.
4. Inspect the element and replace if damaged.
CAUTION:
The engine should never be run without the air/filter element installed; excessive piston and/or cylinder wear may result.
5. Install the element back in the airbox. Installation steps are the reverse of removal.
CAUTION:
Make sure the element cover fits into the corresponding filter case edge.
Brakes
BrakesFRONT BRAKE
Brake Fluid Inspection
1. Check the Brake fluid level. Replenish as required.
NOTE:
Use only DOT 3 or equivalent fluid from a sealed container.
WARNING:
Be sure that:
•Water does not enter the master cylinder when refilling.
•Spilled fluid is cleaned up immediately to prevent painted surfaces or plastic parts from eroding.

(1) Lower level

Front Brake Lever Free Play Adjustment
1. Loosen the adjuster locknut (1)
2. Adjust the free play (a) by turning the adjuster (2) until the free play (a) is within the specified limits.
Brake Lever Free Play (a): 2- 5 mm (0.08- 0.20 in)
CAUTION:
Proper lever free play is essential to avoid excessive brake drag.
3. Tighten the adjuster locknut

Brake Pad Inspection
1. Activate the brake lever.
2. Inspect the wear indicator (1). If the indicator almost contacts disc (2), replace pads. Refer to "CHASSIS."
REAR BRAKE
Rear Brake Pedal Height Adjustment

1. Loosen the adjuster locknuts (1)
2. Adjust the brake pedal height (a) by turning the adjuster (2) until the brake pedal position is at the specified height.
Brake Pedal Height (a): 10 mm (0.4 in) Below the Top of the Footrest
WARNING:
Adjust pedal height, then adjust brake pedal free play.

(1) Wear limit line
Rear Brake Shoe Inspection
1. Depress brake pedal.
2. Inspect the wear indicator (2). if the indicator is at wear limit line (1), replace brake shoes.

Rear Brake Pedal Free Play Adjustment
1. Rotate the adjuster nut (1). Turn it clockwise or counterclockwise until proper brake pedal free play is attained.
Brake Pedal Free Play: 20-30 mm (0.8-1.2 in)
WARNING:
Check to verify correct brake light operation after adjustment.
Brake Light Switch Adjustment
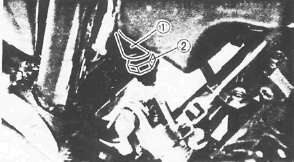
1. Hold the switch body (1) with your hand so that it does not rotate and turn the adjusting nut (2) .
Cable inspection and lubrication
Cable inspection and lubricationCable inspection and lubrication steps:
• Remove the two screws that secure throttle housing to handlebar.
• Hold cable end high and apply several drops of lubricant to cable.
• Coat metal surface of disassembled throttle twist grip with suitable all-purpose grease to minimize friction.
•Check for damage to cable insulation. Replace any corroded or obstructed cables.
• Lubricate any cables that do not operate smoothly.
Yamaha Chain and Cable Lube or SAE 10W30 Motor Oil
BRAKE AND SHIFT PEDALS/ BRAKE AND CLUTCH LEVERS
Lubricate pivoting parts of each lever and pedal.
Yamaha Chain and Cable Lube or SAE 10W30 Motor Oil
CENTERSTAND AND SIDESTAND
Lubricate centerstand and sidestand at their pivot points.
Yamaha Chain and Cable Lube or SAE 10W30 Motor Oil
Suspension Adjustments and Oil Change
Suspension Adjustments and Oil ChangeFRONT FORK OIL CHANGE
WARNING:
Securely support the motorcycle so there is no danger of it falling over.
1. Place a suitable stand under the engine to raise the front wheel off the ground.
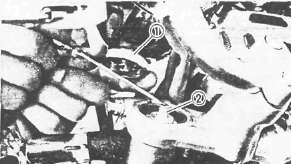
2. Remove the air valve cap (1)
NOTE:
Keep the valve (2) open by pressing it for several seconds so that the air can be let out of the inner tube.
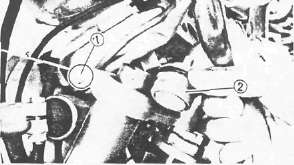
3. Loosen the inner tube pinch bolt (1)
4. Remove the cap bolt (2)
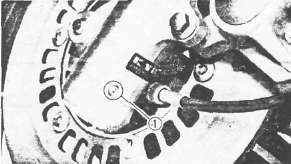
5. Remove the drain screw (1). Drain the fork oil.
WARNING:
Do not allow any oil to contact the disc brake components. If oil is discovered, be sure to remove it, otherwise diminished braking capacity and damage to the rubber components of the brake assembly will occur.
6. Inspect:

•O-ring (1) (Cap-bolt)
•Gasket (Drain bolt screw)
Replace if worn or damaged.
7. Install the drain screw
8. Fill the front forks.
Each Fork:
389 cm3 (13.7 Imp oz, 13.2 US oz)
After filling purnp the forks slowly up and down to distribute the oil.
9. Tighten the cap-bolt and pinch bolt
Cap Bolt: 23 Nm (2.3m.kg, 17 ft-lb)
Pinch Bolt: 20 Nm (2.0 m-kg, 14 ft-lb)
10. Pressurize Fork with specified amount of air. Refer to "Front fork adjustment".
11. Install the fork cap
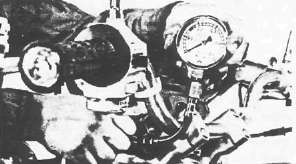
Maximum Air Pressure: 118 kPa (1.2 kg/,cm 17.1 psi) Do not exceed this amount.
FRONT FORK ADJUSTMENT
1. Place motorcycle on centerstand, then elevate front wheel.
NOTE:
Be sure there is no weight on the front end of the motorcycle and the fork tube is at room temperature when air pressure is checked and adjusted.
2. Remove the fork cap
3. Measure the air pressure with an air gauge and adjust as needed.
NOTE:
Increased air pressure causes stiffer suspension; decreased pressure causes softer suspension.
CAUTION:
Do not use a high pressure air supply that will overpressurize the forks faster than the operator can control. Use only a manual pump or low pressure supply to avoid seal damage.
|
Air Pressure Adjustment |
|
|
To increase air pressure |
Use manual air pump or pressurized air supply. |
|
To decrease air pressure |
Release air by pushing valve pin. |

Standard Air Pressure: 39.2 kPa (0.4 kg/cm3, 5.7 psi)
Maximum Air Pressure: 118 kPa (1.2 kg/cm2, 17.1 psi)
Minimum Air Pressure: Zero
4. Install the Fork cap
REAR SHOCK ABSORBER ADJUSTMENT
If the spring seat is raised, the spring becomes stiffer, and if lowered, it becomes softer.

Standard Position: A A. - Softest E. - Stiffest
WARNING:
Always adjust each shock absorber to the same setting. Uneven adjustment can cause poor handling and loss of stability.
Steering Head Adjustment
Steering Head AdjustmentSteering Head Inspection
1. Place the motorcycle on its centerstand, then elevate the front wheel.
2. Check the steering assembly bearings. Grasp the bottom of the forks and gently rock the fork assembly back and forth. Adjust if any looseness can be detected.
Adjustment

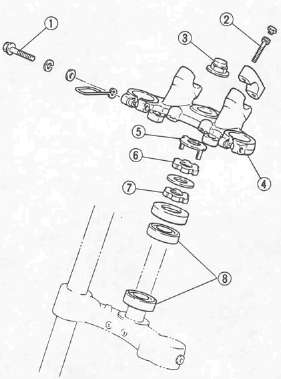
Steering head adjustment steps:
• Loosen the pinch bolts (1) .
• Remove the handlebar securing bolts (2) .
• Remove the handlebar.
•Remove the steering stem nut (3) .
•Remove the steering crown (4) .
•Remove the lock washer (5).
•Loosen the upper ring nut (6) .
•Tighten the lower ring nut (7)
Ring Nut (Lower): 50 Nm (5.0 m.kg, 36 ft-lb)
NOTE:
The tapered side of ring nuts must face downward.
• Loosen the ring nut (7) completely and retighten it to specification.
Rint Nut (Lower): 6Nm (0.6 m-kg, 4.3 ft-lb)
• Check the steering stem by turning it lock to lock. If there is any binding, remove the steering bearings (8) .
(See CHAPTER 6, STEERING HEAD for more details.)
• Hand-tighten the upper ring nut (6) , then align the slots of both ring nuts. If not aligned, hold the lower ring nut (7) and tighten the other until they are aligned.
• Install the lock washer (5).
NOTE:
Make sure the lock washer tab is placed in the slots.
• Install the steering crown (4) and tighten the steering stem nut (3) to specification.
Steering Stem Nut: 110 Nm (11.0 m-kg, 80 ft-lb)
• Install the handlebar (3) and torque the bolt (2) to specification.
Pinch Bolt: 20 Nm (2.0m.kg, 14 ft-lb)
Handlebar Bolt: 20 Nm (2.0 m-kg, 14 ft-lb)

• Install the fork and bolt caps.
Wheels, Bearings and Tires
Wheels, Bearings and TiresFront Wheel Bearings
1. Raise the front end of the motorcycle, and spin the wheel by hand. Touch the axle or front fork white spinning the wheel. Replace the bearings if any vibration is detected.
Note: It may be necessary to retract the brake pads from the disk in order to freely rotate the wheel.
Rear Wheel Bearings
1. Remove the rear wheel

2. Check the bearing movement by rotating it with the fingers. Replace if any roughness or wear is detected.
TUBELESS TIRES AND ALUMINUM WHEELS
WARNING:
Always inspect aluminum wheels before a ride.
Do not attempt any repairs to the wheel; replace any defective wheel.
Do not attempt to use tubeless tires on a wheel designed for use with tube-type tire only. Tire failure and subsequent personal injury may result from sudden deflation.
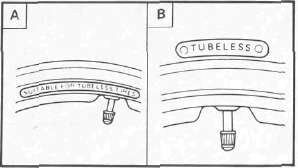
|
A | Wheel |
B Tire |
|
Tube type |
Tube type only |
|
Tubeless |
Tube type or tubeless |
• Be sure to install the proper tube when using tube-type tires.
• New tires have a relatively poor adhesion on the road surface so do not allow them to be subjected to high speed load from maximum speed until after a break-in run of approx. 100 km (60 mi).
• Always use the correct tire inflation pressure according to the operating conditions.

(C) Tubeless tire
(D) Tube type tire
(1) Air valve
(2) Aluminum wheel {Tubeless type)
(3) Tube
(4) Aluminum wheel (Tube type)
Always perform the following steps to ensure safe operation, maximum tire performance and long service.
1. Measure the tire pressure and adjust as necessary.
|
Basic weight: With oil and full fuel tank |
232 kg (511 lb) |
|
|
Maximum load-*- |
238 kg (525 lb) load |
|
|
Cold tire pressure |
Front |
Rear |
|
Up to 90 kg (198 1b) load* |
177 kPa (1.8 kg/cm2, 26 psi) |
196 kPa (2.0 kg/cm2, 28 psi) |
|
90 kg (198 1b) load ~ 238 kg (525 lb) |
196kPa (2.0 kg/cm2, 28 psi) |
275 kPa (2.8 kg/cm2, 40 psi) |
|
High speed riding |
206 kPa (2.1 kg/cm2, 30 psi) |
226 kPa (2.3 kg/cm2, 32 psi) |
* Load is the total weight of cargo, rider, passenger, and accessories.
2. Inspect the tire surfaces for wear or damage. Replace as required.
Minimum Tire Tread Depth: (Front and Rear) 1.0 mm (0.04 in)

(1) Tread depth
(2) Side wall
(3) Wear indicator
3. Inspect the aluminium wheels for damage or cracks. Never attempt even small repairs to the wheel.
NOTE:
Always balance the wheel when a tire or wheel has been changed or replaced.
WARNING:
Ride conservatively after installing a tire to allow it to seat itself properly on the rim.
Electrical Maintenance
Electrical MaintenanceBattery
Battery xjcdadmin Mon, 05/04/2009 - 17:01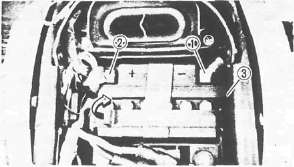
1. Disconnect:
• Negative lead (1)
• Positive lead (2)
• Breather hose (§)
2. Remove the battery

3. Check the fluid level. It should be between upper (1) and lower (2) level marks.
CAUTION:
Refill with distilled water only; tap water contains minerals harmful to a battery.
4. Inspect the breather hose (1) for obstructions. Clear or replace as necessary.
5. Connect the breather hose (1). Be sure the hose is properly attached and routed.
HOW TO ROUTE BATTERY BREATHER HOSE.

CAUTION;
Always charge a new battery before using it to ensure maximum performance.
Charging Current: 1.4 amps/10 hrs

Specific Gravity:
1.280 at 20°C(68°F)
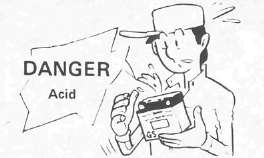
WARNING: Battery electrolyte is dangerous; it contains sulfuric acid and therefore is poisonous and highly caustic. Always follow these preventive measures:
• Avoid bodily contact with electrolyte as it can cause severe burns or permanent eye injury.
• Wear protective eye gear when handling or working near batteries.
Antidote (EXTERNAL):
• SKIN - Flush with water.
• EYES - Flush with water for 15 minutes and get immediate medical attention.
Antidote (INTERNAL):
• Drink large quantities of water or milk follow with milk of magnesia) beaten egg, or vegetable oil. Get immediate medical attention.
Batteries also generate explosive hydrogen gas, therefore, you should always follow these preventive measures:
• Charge batteries in a well-ventilated area.
• Keep batteries away from fire, sparks, or open flames (e.g., welding equipment, lighted cigarettes, etc.)
• DO NOT SMOKE when charging or handling batteries.
KEEP BATTERIES AND ELECTROLYTE OUT OF REACH OF CHILDREN.
Headlight and Fuses
Headlight and FusesHEADLIGHT
Headlight Bulb Replacement

1. Remove securing screws (1) from light unit assembly/headlight body.
2. Disconnect the headlight lens unit leads
3. Remove the light unit assembly

4. Rotate the bulb holder (1) counterclockwise.
5. Remove the defective bulb

6. Install new bulb and secure with bulb holder.
CAUTION:
• Avoid touching glass part of bulb.
• Keep the bulb free from oil otherwise, transparency of glass, bulb life, and luminous flux will be adversely affected.
• If oil gets on bulb, clean it with a cloth moistened thoroughly with alcohol or lacquer thinner.
WARNING:
Do not touch the headlight bulb when it is on, as the bulb generates enormous heat; keep flammable objects away.
7. Install the light unit assembly to headlight body.

Headlight Beam Adjustment Horizontal adjustment:
1. Rotate the horizontal adjusting screw (1)
|
Horizontal Adjustment of Headlight Beam |
|
|
Adjusting screw |
Beam direction |
|
Turn clockwise |
> to Right |
|
Turn counterclockwise |
<- to Left |
|
Horizontal Adjustment of Headlight Beam |
|
|
Adjusting screw |
Beam direction |
|
Turn clockwise |
> to Right |
|
Turn counterclockwise |
< to Left |
Vertical adjustment: 1. Rotate:
• Vertical adjusting screw (2)
|
Vertical Adjustment of Headlight Beam |
|
|
Adjusting screw |
Beam direction |
|
Turn clockwise |
to Raise |
|
Turn counterclockwise |
to Lower |
FUSE
The fuse box is under the indicator light panel. The main fuse is under the seat.

(1) Main fuse
(2) Spare fuses

(3) Other fuse block
Blown fuse procedure steps:
• Turn off ignition and the circuit.
• Install a new fuse of proper amperage.
• Turn on switches to verify operation of electrical device.
• If fuse blows immediately again, check circuit in question.
WARNING:
Do not use fuses of higher amperage rating than recommended. Extensive electrical system damage and fire could result from substitution of a fuse of improper amperage.
Periodic Maintenance Intervals
Periodic Maintenance Intervals
|
Item |
Remarks |
EVERY |
||
|
Break-in 1,000km (600mi) |
6,000km (4,000mi) or 6 months |
12,000km (8,000mi) or 12 months |
||
|
Valve(s)* |
Check valve clearance. Adjust if necessary. |
Every 42,000 km (26,600 mi) |
||
|
Spark plug{s) |
Check condition. Clean or replace if necessary. |
o |
o |
o |
|
Air filter |
Clean. Replace if necessary. |
|
o |
o |
|
Carburetor* |
Check idle speed/synchronization/starter operation. Adjust if necessary. |
o |
o |
o |
|
Fuel line* |
Check fuel hose and vacuum pipe for cracks or damage. Replace if necessary. |
|
o |
o |
|
• Engine oil |
Replace (Warm engine before draining). |
o |
o |
o |
|
Engine oil filter* |
Replace. |
o |
|
o |
|
Final gear oil |
Check oil level/oil leakage. Replace every 24,000 (16,000) or 24 months. |
Replace |
o |
o |
|
Front brake* |
Check operation/fluid leakage/See NOTE. Correct if necessary. |
|
o |
o |
|
Rear brake |
Check operation. Adjust if necessary. |
|
o |
o |
|
Clutch |
Check operation. Adjust if necessary. |
|
o |
o |
|
Rear arm pivot* |
Check rear arm assembly for looseness. Correct if necessary. Moderately repack every 24,000 (16,000) or 24 months.* * |
|
|
o |
|
Wheels* |
Check balance/damage/runout. Repair if necessary. |
|
o |
o |
|
Wheel bearings* |
Check bearings assembly for looseness/damage. Replace if damaged. |
|
o |
o |
|
Steering bearing* |
Check bearings assembly for looseness. Correct if necessary. Moderately repack every 24,000 (16,000) or 24 months."* |
o |
|
o |
|
Front forks* |
Check operation/oil leakage. Repair if necessary. |
|
o |
o |
|
Rear shock absorber* |
Check operation/oil leakage. Repair if necessary. |
|
o |
o |
|
Cooling system |
Check coolant leakage. Repair if necessary. Replace coolant every 24,000 (16,000) or 24 months. |
|
o |
o |
|
Fittings/Fasteners" |
Check all chassis fittings and fasterners. Correct if necessary. |
O |
O |
O |
|
Center and sidestand* |
Check operation. Repair if necessary. |
o |
o |
O |
|
Sidestand switch* |
Check operation. Clean or replace if necessary. |
o |
o |
o |
|
Battery* |
Check specific gravity. Check breather pipe for proper operation. Correct if necessary. |
|
o |
o |
|
AC generator* |
Replace generator brushes. |
|
|
o |
*: It is recommended that these items be serviced by a Yamaha dealer. **: Medium weight wheel bearing grease.
NOTE:
Brake fluid replacement:
1. When disassembling the master cylinder or caliper cylinder, replace the brake fluid. Normally check the brake fluid level and add the fluid as required.
2. On the inner parts of the master cylinder and caliper cylinder, replace the oil seals every two years.
3. Replace the brake hoses every four years, or if cracked or damaged.