
Removal
1. Remove the rear wheel.
2. Remove the final gear case assembly.
3. Remove the drive shaft.
4. To remove the universal joint, it is necessary to remove the swing arm. Remove the universal joint assembly.
Inspection
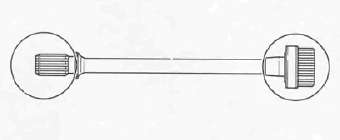
1. Drive shaft
Inspect the shaft splines for wear and/or damage. If excessive, replace the drive shaft
NOTE: When installing the drive shaft lubricate splines with molybdenum disulfied grease.
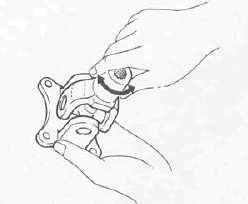
2. Universal joint
a. There should be no noticeable play in the universal joint bearings. If there is any play in the bearing, replace the universal joint assembly.
b. Move the universal joint up and down and from side to side. The universal joint should move smoothly. Without tightness, binding or rough spots that could indicate damaged bearings. If damaged, replace the universal joint assembly.
Reinstallation
When installing the drive shaft and the universal joint reverse the removal procedure. Note the following points:
1. Lubricate the shaft splines with molybdenum disulfied grease.
2. Tighten the universal joint securing bolts and final gear case securing nuts with the specified torque:
Final gear case:
42 Nm (4.2 mkg, 30 ft lb) Universal joint:
44 Nm (4.4 mkg, 32 ft-lb)
- Printer-friendly version
- Log in to post comments