650H (Euro)

Middle Gear Reassembly

Submitted by xjcdadmin on Wed, 06/10/2009 - 17:02

6. Middle gear (installation only, refer to page 67 for the middle gear adjustment)

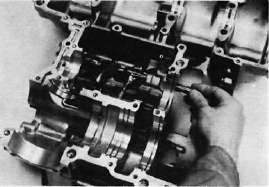
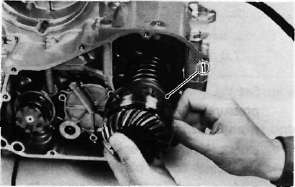
a. Install the middle drive gear assembly with the proper size of shim(s) and secure it with the bearing retainers and new "TORX" screws.

Tightening torque: 2.5 m-kg (18 ft-lb)
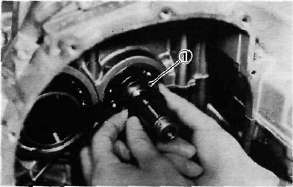
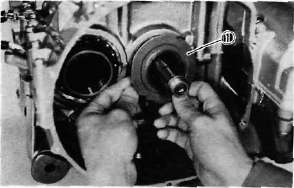
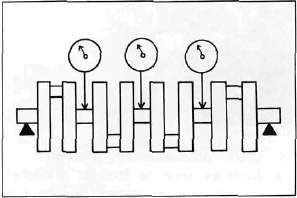
1. Shims

Lower Crankcase Reassembly

Submitted by xjcdadmin on Thu, 06/04/2009 - 12:15

2. Lower crankcase

a.   Install the shift cam and secure it with the guide pin. Install the stopper plate and bolt and tighten securely.

b.   Install the neutral switch.

c. Install the transmission drive axle assembly into the crankcase.

Cylinder Head Removal

Submitted by xjcdadmin on Thu, 06/04/2009 - 12:15

ENGINE OVERHAUL

A. Cylinder Head and Cylinder

1.    Remove the cylinder head cover.

2.    Remove the left crankcase cover (pickup coil cover).

3.    Remove the cam chain tensioner.

Clutch and Shifter Reassembly

Submitted by xjcdadmin on Thu, 06/04/2009 - 12:15

5. Clutch assembly

a. Install the thrust plate onto the transmission main axle.

1. Thrust plate

b. Install the oil pump drive sprocket onto the main axle without the spacer collar and place the oil pump drive chain on its sprocket.

1. Oil pump drive sprocket

Lower Crankcase Disassembly

Submitted by xjcdadmin on Thu, 06/04/2009 - 12:15

L. Lower Crankcase

1.    Remove the dowel pin and "O-ring".

2.    Remove the shift fork guide bar and shift forks. The shift forks are identified by numbers cast on their sides.

3.    Remove the bolt securing the shift cam locating pin and remove the stopper plate and locating pin.

4.    Remove the neutral switch.

Transmission -- Inspection and Repair

Submitted by xjcdadmin on Thu, 06/04/2009 - 12:15

L. Transmission

1. Inspect each shift fork for signs of galling on gear contact surfaces. Check for bending. Make sure each fork slides freely on its guide bar.

2.    Roll the guide bar across a surface place. If the bar is bent, replace.

3.    Check the shift cam grooves for signs of wear or damage. If any profile has excessive wear and/or damage, replace cam.

Crankshaft, Con rods and Bearings -- Inspection and Repair

Submitted by xjcdadmin on Thu, 06/04/2009 - 12:15

I. Crankshaft

1. Crankshaft run-out

Support the crankshaft at both ends on V-blocks. Measure the amount of crankshaft run-out on the main bearing journals with a dial gauge while rotating crankshaft.

Run-out limit: 0.040 mm (0.0016 in!

If run-out exceeds limit, replace crankshaft.

2. Inspection of bearings

Pistons and Cylinder Reassembly

Submitted by xjcdadmin on Thu, 06/04/2009 - 12:15

11. Pistons and Cylinder a. Install the pistons on the rods. The arrow on the piston must point to the front of the engine.

NOTE:--------------------------------------------------------

Before installing the piston pin clips, cover

the crankcase with a clean rag so you will

not accidentally drop the circlip into the

crankcase.