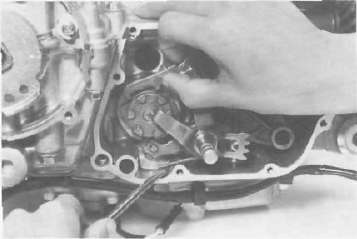
7, Shifter assembly a. Install the shift shaft assembly with the stopper lever.

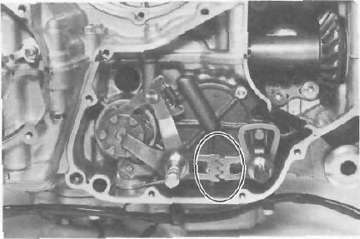
b. Install the shift lever assembly with the positioning spring is properly located on the stopper pin and the teeth should be set properly as shown.

c. Install the left crankcase cover (shifter cover) using a new gasket.
Tightening torque:
12Nm(1.2 mkg, 8.7 ft-lb)
8. A.C. generator a. Install the rotor onto the shaft and tighten the bolt using the rotor holding tool (special tool).
Tightening torque:
55 Nm (5.5 mkg, 40 ft-lb)
b. Install the stator coil assembly onto the crankcase and align the grooves on the stator core with the bolt holes on the crankcase.

c. Install the A.C. generator cover assembly and tighten the bolts to the specification. Do not forget to install the new gasket.
Tightening torque:
12 Nm (1.2 mkg, 8.7 ft-lb)
9. Starter motor
a. Route the A.C. generator leads as shown.
b. Install the starter motor and tighten the bolts to the specification.
Tightening torque: 7 Nm (0.7 mkg, 5.1 ft-lb)
NOTE: Be careful the "O-ring" is not damaged when installing the starter motor.

1 O-ring 2. A. C generator lead
10. Pick-up coil assembly
a. Install the pick-up coil assembly onto the crankcase.
b. Install the timing plate on the crankshaft and tighten the bolt to the specification.
NOTE:
1) Note that there is the locating pin on the crankshaft and the corresponding slot in the timing plate which must be aligned to install the timing plate.
2) Make sure the wire harness clips are properly positioned.


- Printer-friendly version
- Log in to post comments
