Chapter 5. Chassis
- Read more about Chapter 5. Chassis
- Log in to post comments

|
|
Fresh air |
|
|
1. Examine the carburetor body and fuel passages. If contaminated, wash the carburetor in a petroleum-based solvent. Do not use caustic carburetor cleaning solutions. Blow out all passages and jets with compressed air.
2. Examine the condition of the floats. If the floats are damaged, they should be replaced.
3. Inspect the float needle valve and seat for wear or contamination. Replace these components as a set.
CAUTION:
Separation of the carburetors is not recommended. Usual disassembly for cleaning and inspection does not require separation of the carburetors. The carburetor body support screws are locked with a locking compound such "LOCTITE". If the carburetors are separated, misalignment will result.
1. Loosen the starter lever securing screws and remove the starter lever shaft.
CARBURETOR
A. Section view
B. Specifications
|
Main jet |
# 112.5 |
Refer to Engine Removal. Reverse the applicable removal steps.
CAUTION:
Always use new bolts in the drive shaft coupling.
2. Install and tighten the engine mounting bolts.
Engine mounting bolt torque:
10 mm nut: 4.2 m-kg (30.5 ft-lb)
10 mm bolt: 4.2 m-kg (30.5 ft-lb)
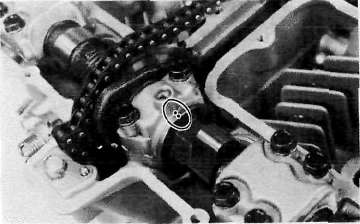
a. Rotate each cam shaft until the dot on the cam is aligned with the arrow on the center cam cap.
CAUTION:
Use extreme caution when rotating the cams. Two possible dangers exist. First, the wrench may contact the head and fracture it. Or second, a valve may become bent if the cam is turned the wrong way.

a. Install the new cylinder head gasket. Install the dowel pins and "o-rings".

b. Install the cylinder head onto the cylinder. Pull the cam chain through the cylinder head as it is installed. Tie the cam chain so that it does not fall into the crankcase.
a. Install the pistons on the rods. The arrow on the piston must point to the front of the engine.
NOTE:
Before installing the piston pin clips, cover the crankcase with a clean rag so you will not accidentally drop the circlip into the crankcase. Always install new piston pin circlips.

a. Install the rotor onto the shaft and tighten the bolt using the rotor holding tool (special tool) as shown.

1. Rotor holding tool
Tightening torque: 3.5 m-kg (25.5 ft-lb)
b. Install the stator coil assembly onto the crankcase and align the grooves on the stator core with the bolt holes on the crankcase.