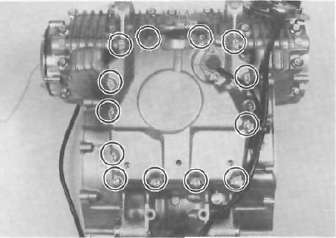
Upper Crankcase Assembly
CRANKSHAFT/PISTON
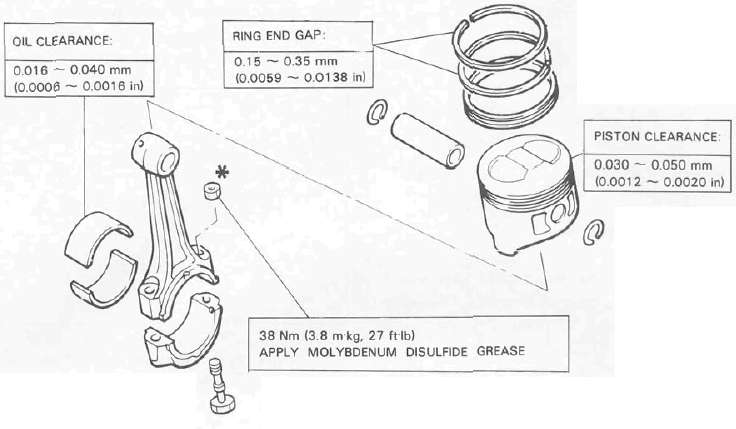
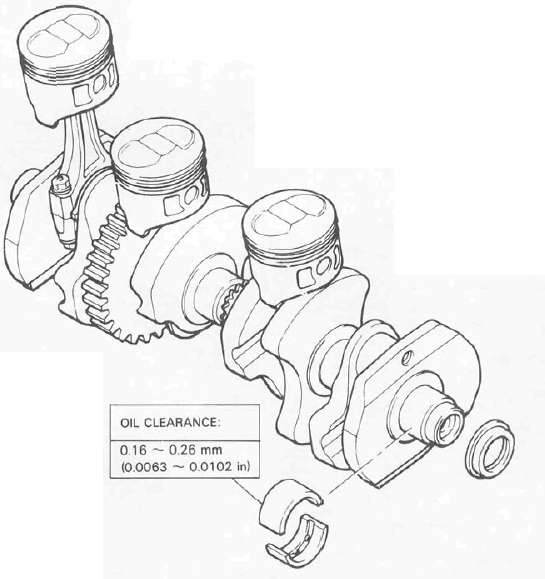
. WHEN INSTALLING THE CONNECTING ROD. BE SURE THAT THE SECURING NUTS ARE ON TOP.
Engine assembly
- Read more about Upper Crankcase Assembly
- Log in to post comments
CRANKSHAFT/PISTON
. WHEN INSTALLING THE CONNECTING ROD. BE SURE THAT THE SECURING NUTS ARE ON TOP.
Engine assembly
Oil pump removal and disassembly
1. Remove the strainer cover. Note the wire harness clip position.
2. Remove the oil pump secruing bolts and remove the sprocket cover and oil pump assembly.
Important information
1. All gaskets and seals should be replaced when an engine is overhauled. All gasket surfaces and oil seal lips must be cleaned.
2. Properly oil all mating engine and transmission parts and bearings during reassembly.
A. ENGINE
Cylinder head:
Volume 24,5 ±0.4 cm3 (1.49 ± 0.0244 cu.in)
Warp limit < 0.03 mm (0.0012 in)
 * Lines indicate straightedge measurement
Cylinder:
ENGINE REMOVAL
NOTE: It is not necessary to remove the engine in order to remove the cylinder head, cylinder, or pistons.
Preparation for removal
1. All dirt, mud, dust and foreign material should be thoroughly removed from the exterior of the engine before removal and disassembly. This will help prevent any harmful foreign material from engine oil.
Remounting engine
1. Assembly is the reverse the applicable removal steps.
CAUTION: Always use new bolts in the drive shaft coupling.
2. Install and tighten the engine mounting bolts-
Engine mounting bolt torque: 8 mm bolt:
20 Nm (2.0 m-kg, 14 ft-lb) 10 mm bolt:
|
1. a. b. |
Cylinder Head Volume |
|
| ||||
