Chapter 4, CARBURETION & AIR FLOW
CARBURETOR

- Read more about Chapter 4, CARBURETION & AIR FLOW
- Log in to post comments
CARBURETOR
SPARK PLUG
1. Remove:
• Spark plug(s)
2. Inspect:
• Electrode (1) Wear/Damage — Replace.
• Insulator color (2)
3. Measure:
• Plug gap (3)
Use a Wire Gauge or Feeler Gauge. Out of specification — Regap.
A simple check of the float levels can be done on the bike, with the bike properly leveled on the centre stand, etc. Adjusting them is best done off the bike.
CARBURETOR
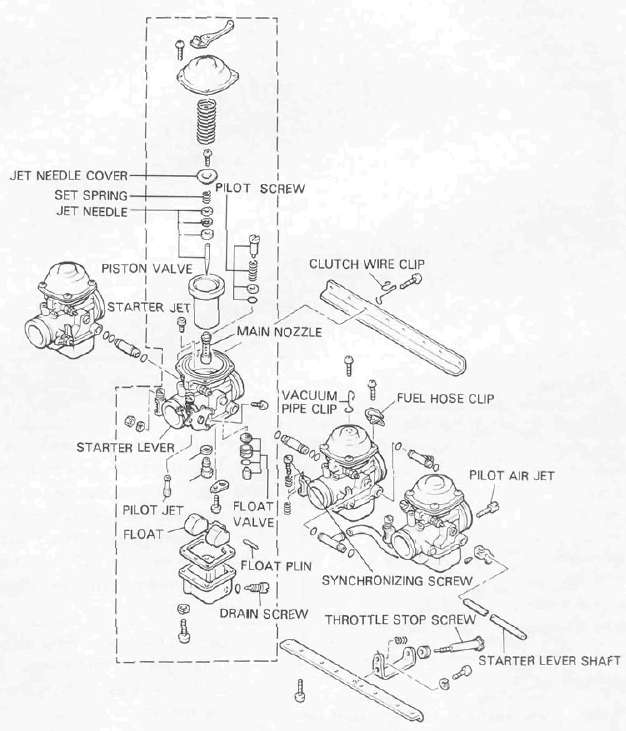
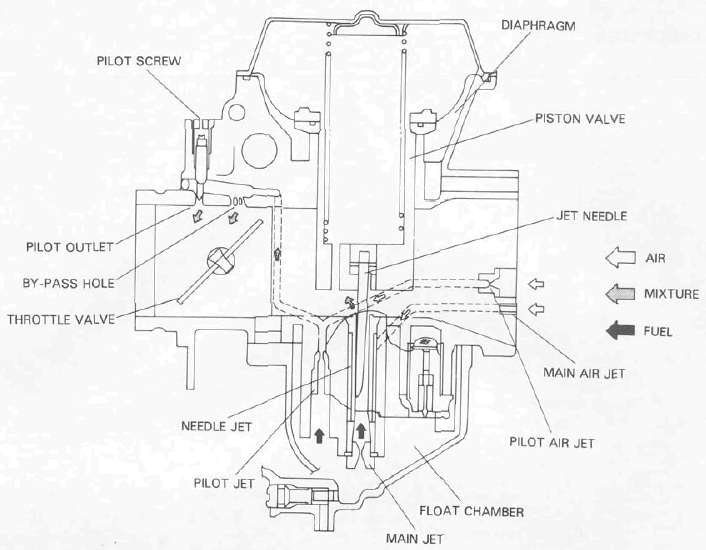
Section view
Specifications
|
Main jet |
# 102.5 |
Fuel petcock cleaning
1. Turn the fuel petcock lever to the "RES". Remove the fuel pipe from the fuel petcock.
2. Remove the seat, the fuel tank clamp, and the fuel-tank-retainer plate.
3. Lift the tank and remove the drain cover and clean it with solvent. If gasket is damaged, replace.
Carburetor synchronization
The seat must be removed and the rear of the tank elevated to gain access to the vacuum connections and synchronizing screw.
NOTE:
The valve clearances must be set properly before synchronizing the carburetors.
CARBURETOR

Section View
CARBURETOR
Section view
Specifications
|
Main jet |
# 102.5 |
This series assumes you took the carbs apart, and are trying to figure out how to put them back together again. If you haven’t taken them apart yet, it’s a good idea to skim through this first anyway. Address any questions to: xj-owners@micapeak.com, and we’ll try to talk you through it.
Pictures and text by Dwayne Verhey
NOTE:
The carburetors are numbered 1, 2, 3, and 4 from the left when viewed from astride the motorcycle.
1. Idle mixture
The idle mixture is set at the factory by the use of special equipment. No attempt should be made by the dealer to change this adjustment.
2. Synchronization