1. Remove the cylinder head cover.
2. Remove the left crankcase cover (pickup coil cover).
3. Remove the cam chain tensioner.

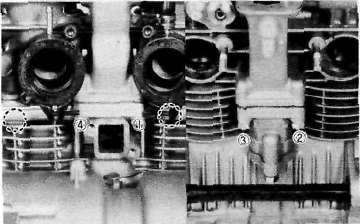
Use a 19 mm wrench on the timing plate flats to rotate the crankshaft counterclockwise until the engine is at T.D.C.

CAUTION:
Never use an alien wrench to rotate the crankshaft. Always use the 19 mm flats provided on the timing plate to rotate this engine.
5. Remove the center cam shaft caps. Next, remove the four cam sprocket bolts.
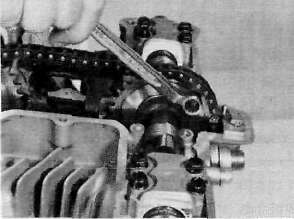
6. Slip each sprocket off its mounting boss on the cam.
CAUTION:
From this point on, do not rotate the cam shaft or valve damage may occur. On this, it is not necessary to break the cam chain. However, it can be broken if so desired. It is easier to disassemble the engine without separating the chain.
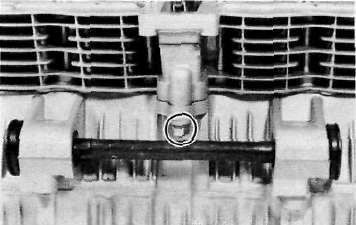
7. Remove the cam chain guide.
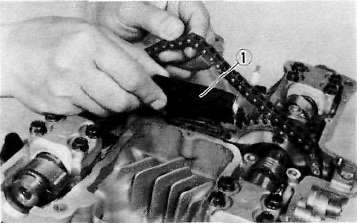
1. Cam chain guide
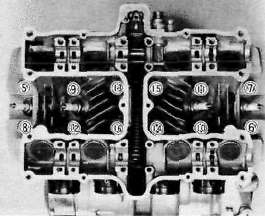
8. Remove the cam caps. Note the location of the cam caps. The caps for the intake cam shaft are identified 1-1 through I-4. The exhaust cam caps are identified E-1 through E-4. Directional arrows are cast on each cap and point toward the clutch side.

9. Fasten safety wire to the cam chain to prevent its falling into the crankcase cavity.
Slide the cams and sprockets from under the chain and remove the cams and sprockets.

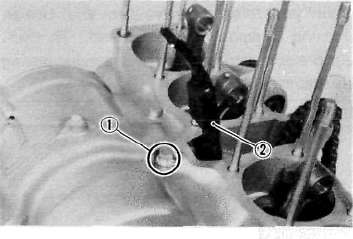
10. Remove the cam chain guide securing bolt and lock nut. Remove the front cam chain guide.
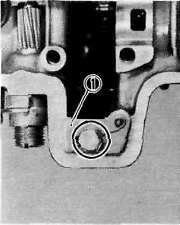
1. Lock washer 2. Front cam chain guide
11. Remove the spark plugs.
12. Remove the cylinder head bolts and nuts in the numerical order as shown. Start by loosening each nut 1/2 turn until all of the nuts are loose. Remove the cylinder head.
13. Remove the front cylinder holding nut and remove the cylinder assembly. It may be necessary to tap the cylinder lightly to loosen it from the base gasket.
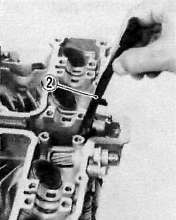
14. Remove the rear cam chain guide by loosening the holding bolt.
1. Holding bolt 2. Rear cam chain guide
- Printer-friendly version
- Log in to post comments