1. Oil level measurement a. Place the motorcycle on the center stand, Warm up the engine for several minutes.
NOTE:
Be sure the motorcycle is positioned straight up when checking the oil level; a slight tilt toward the side can produce false readings.
b. With the engine stopped, check the oil level through the level window located at the lower part of the right side crank-case cover.
NOTE:
Wait a few minutes until the oil level settles before checking.

1. Maximum mark 2- Minimum mark 3. Level window
c. The oil level should be between maximum and minimum marks. If the level is lower add sufficient oil to raise it to the proper level.
2. Engine oil and oil filter replacement
a. Start the engine and stop it after a few minutes of warm-up.
b. Place an oil pan under the engine and remove the oil filler cap.
c. Remove the engine drain plug and drain the oil.

1. Engine drain plug
d. Remove the oil filter bolt and filter element.

1. Oil filter cover
e. Re-install the drain plug (make sure it is tight).
Drain plug torque: 4.3 m-kg (31.0 ft-lb)
f. Install the new oil filter element, new "O-ring" and filter cover, and tighten the oil filter bolt.
Oil filter bolt torque: 1.5 m-kg (11.0 ft-lb)
NOTE:
When installing the filter cover, make sure the "O-ring" is positioned properly and insert the locating projection on it into the corresponding guides on the crankcase.

1. Proper O-ring position
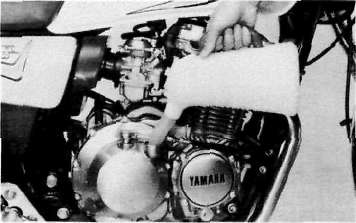
g. Add oil through the oil filler hole.
CAUTION:
Take care not to allow foreign material to enter the crankcase.
Periodic oil change: 2.2 lit (2.3 US qt.)
With oil filler replacement: 2.5 lit (2.6 US qt.)
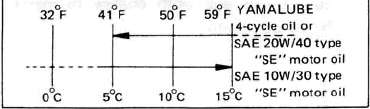
Recommended oil:
h. After replacement of the engine oil and/ or oil filter, be sure to check for oil leakage. The oil level indicator light should go off after the engine has started.
CAUTION:
If the indicator light flickers or remains on, the oil level switch may be damaged. Refer to "CHAPTER 6" for corrective action.
- Printer-friendly version
- Log in to post comments