INSTALLATION
1. Install carburetors: Reverse the removal steps.
Yeah, right...
Maxim X Carburetor Installation
A Technique for reinstalling old hardened intake boots. (Note: This will probably not work on other models with long boots)
This is not a Yamaha procedure. It was developed by Joe D. HAP and dv
Step 1. After soaking the rubber in a bucket of hot water, secure each air box boot to the carburetor with it's clamp.
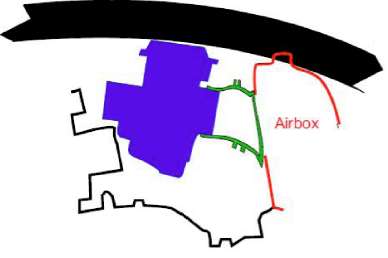
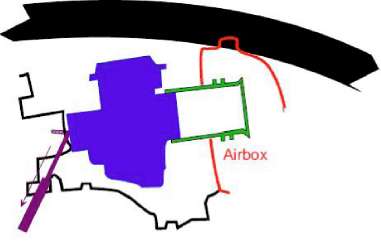
Step 2. Slide the carbs in from the right hand side above the rubber intake manifolds on the engine and below the frame. The free end of the boot is usually much more flexible than the end that has been attached to a hot carburetor for 20 years and will flex. Take care not to pull the boots off the carbs, especially when easing #4 around the clutch cable. This is far easier to accomplish with at least two people. The rubber manifolds will also require some 'massaging* as the float bowls pass by.
Step 3, Once the carburetors are aligned with their respective intake manifolds, ease the air box boots into their holes. There are two lips that normally sit on either side of the airbox wall. Ignore them for now.
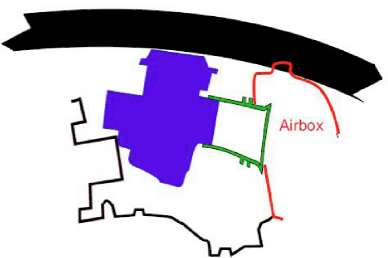
Step 4. Pull back on the carbs enough to gain clearance between the front and the manifolds. Rotate the front of the carbs down into position. Carefully examine all around each one to ensure the rubber has not folded in front of the carb. Use a hooked too: to pull any folds out as required.

Step 5, Push the carburetors forward into the manifolds. They will snap into place as the lip engages the groove on the carburetor. Secure with clamps. Massage the airbox boots into place with a long straight screwdriver. Now is the time to ensure the sealing lips are properly positioned with one lip on either side of the airbox.
After installation, set the throttle free-play. See Carburetor Adjustments for details.
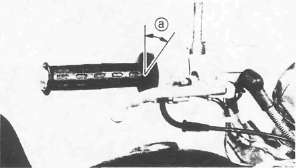
Throttle Cable Free Play a: 2- 5 mm (0.08-0.20 in)
- Printer-friendly version
- Log in to post comments